How To Make Your Business Show Up On Google & Google Maps – A Step By Step Guide That Any Business Owner Can Follow15 min read
January 13, 2021While almost everyone uses a search engine like Google on a daily basis, there are still a surprising number of local businesses that are not listed on Google or are listed but not easily discoverable by their ideal customers or clients.
If that sounds like you, you’re probably wondering, “How can I make my business show up on Google?” In a nutshell, here are the basic steps:
Create a “Google My Business” listing and get it verified, build a website (it doesn’t have to be fancy), and publicize your business’ name, address, and phone number.
In this guide, you will learn how to easily execute each of those steps so that you can get your business from not showing up on Google to ranking in the #1 spot in Google for your business name.
You don’t have to be computer-savvy or have any marketing skills to follow this guide. We’ve broken down each step into bite-sized chunks so that even an intern or an assistant can follow these steps.
Phase 1: Create A Google My Business Listing To Get Listed On Google Maps
Getting your business listed on Google Maps means that clients or customers who already know about your business will be able to easily get directions to your store or office.
It’s also the first step in showing up when people search for local businesses that offer specific services. If you’re a roofing contractor, wouldn’t it be great to show up, front and center, on Google Maps when people search for “roof repair near me”?
In order for your business to show up in Google Maps, you need to create and verify a “Google My Business” listing. It’s free and easy to do. Here’s how to do that, step by step.
Step 1: Log in to your Google account.
You’ll need a Google account in order to create and verify your listing. Go to any Google service page, such as https://myaccount.google.com/ and log in. You may use a personal Google account (your account email address and username will not show up publically), but if you have a Google account for your business, we recommend that instead. If you don’t have a Google account yet, you can create a new one here.
Step 2: Go to “Google My Business”
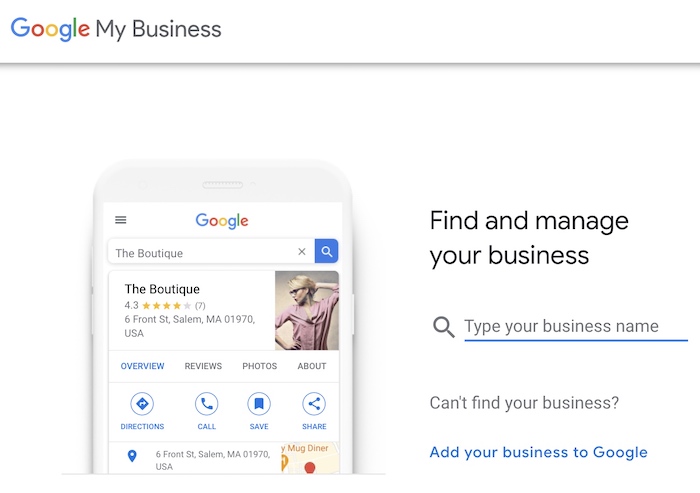
If you’re logged in (see previous step), go to https://business.google.com/create and you should see an option to search for your business. Type your business name, and if a listing shows up then click on it to claim it. If nothing shows up, click the option to “Create a business with this name.”
Step 3: Type Out The Name Of Your Business
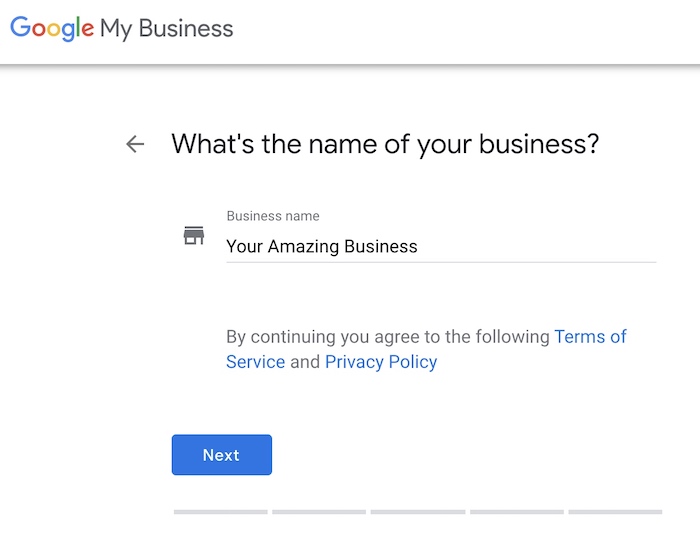
In the “business name” box, type out the exact name of your business as you would like it to be shown publically. You don’t have to include a suffix like “LLC” or “Inc”, although you may if you would like to.
Step 4: Choose Your Business Category

In the “Business category” box type out a category that best defines your business. This is how Google determines when to show your business listing to people who are searching for the services you offer.
We recommend going as broad as possible while still remaining accurate. For example, if you only do residential roofing jobs, then “Roofing contractor” is probably your best category. However, if you do roofing jobs, kitchen remodeling, flooring installation, etc, then “General contractor” is probably your best category.
Step 5: Does Your Business Have A Physical Location?
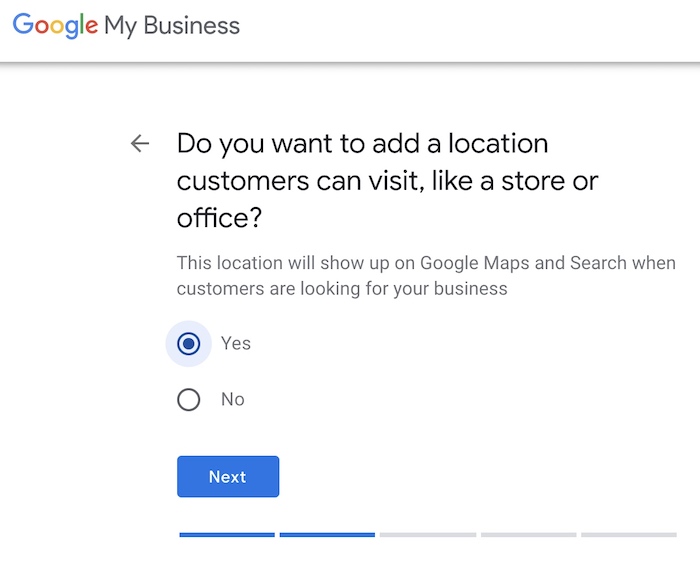
By choosing “Yes” here, it means that when people are searching for your business or for services that your business offers, people will be able to see where your business is located in relation to them.
In most situations, “Yes” is the best option to choose. If your business has a store-front where customers can visit, definitely choose “Yes”. Even if your clients or customers don’t typically visit your office or home office (such as if you’re a sole proprietor offering roof repair services), we still recommend choosing “Yes” so that people can see if you’re relatively close to them.
If for some reason you do not want your address to show up on your Google My Business listing, then choose “No” in this step.
Step 6: Type Out Your Business Address
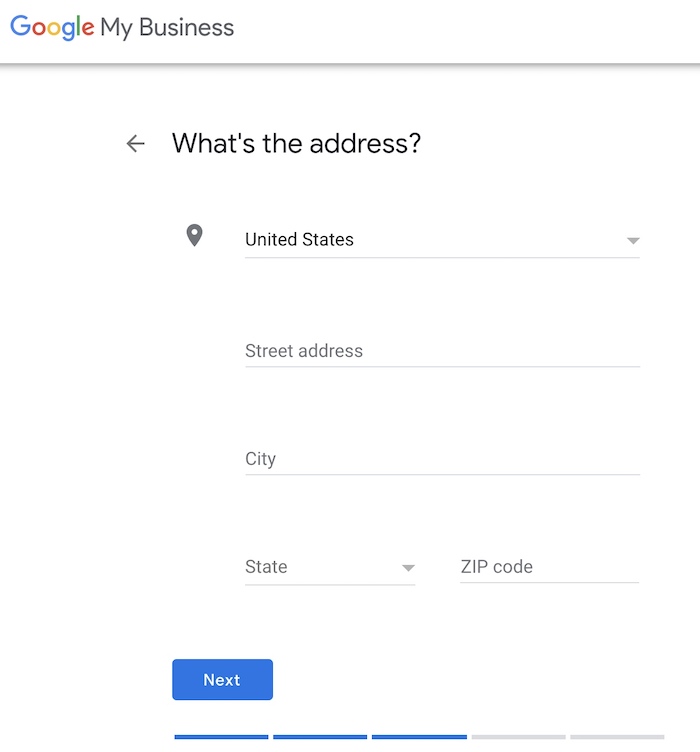
If you chose “Yes” in the previous step, you’ll need to type out your business’ physical address. If you chose “No” in the previous step, you can skip to the next step.
Step 7: Check For An Existing Listing
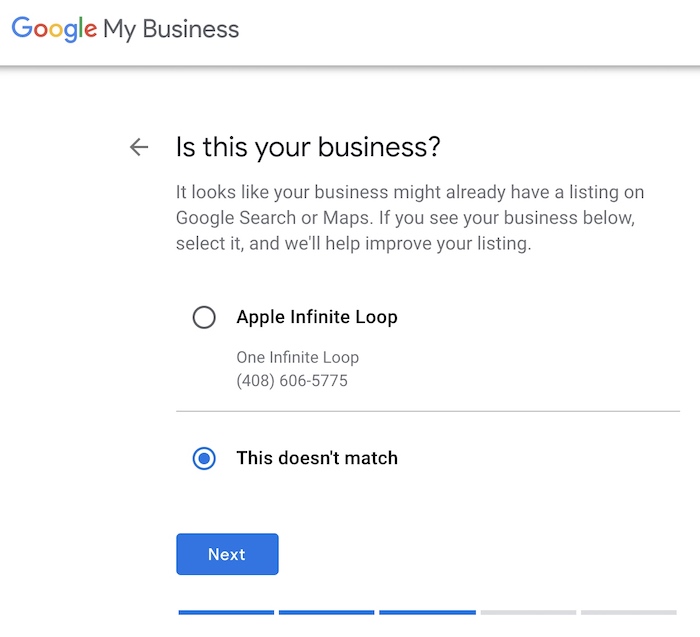
If you see the screen above next, then it means Google has found a listing that matches your business’ address. If the business name associated with the address is your business name, select it. This means that Google somehow already discovered your business’ name and address by itself. If it doesn’t match, click “This doesn’t match” and then click Next.
Step 8: Your Business’ Service Area
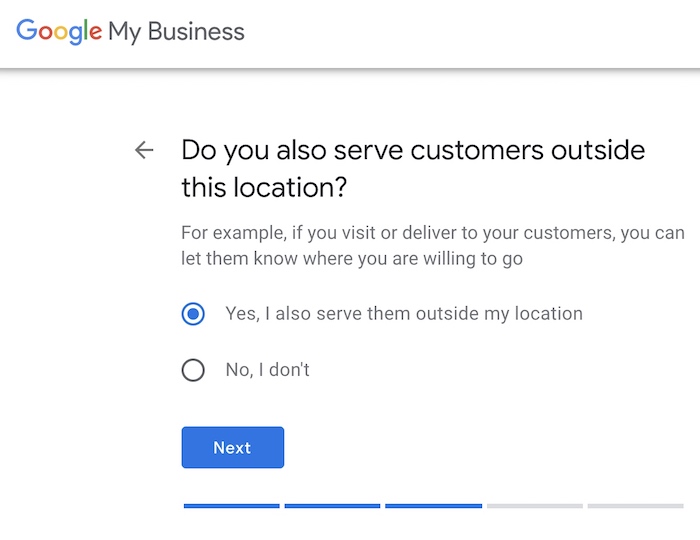
If your business serves beyond the immediate area where you are located, select “Yes”. This is common for service-based businesses such as construction contractors, delivery services, law practices, etc.
Step 9: Areas You Serve
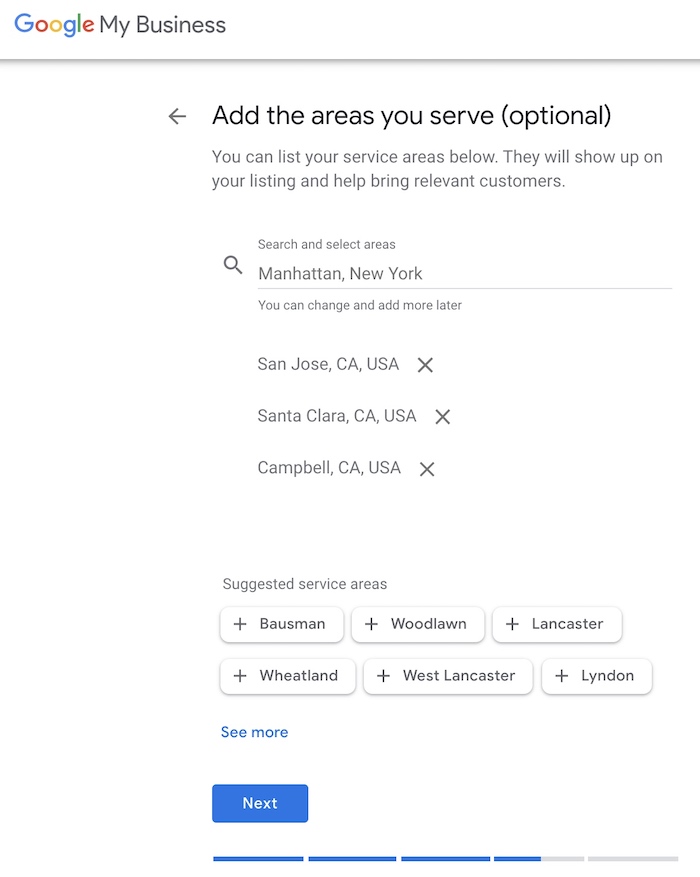
If you chose “Yes” in the previous step, you’ll now be given the option to define where you can serve your clients. Type in all of the areas where you can serve your clients. This helps Google to show your listing to people who are geographically within the area that you serve. Proximity is one of the GMB ranking factors that influence rank performance.
The fastest and easiest way to finish this step is to type in county names instead of specific towns or cities. For example, if you serve an entire county that has 15 cities within that county, you simply need to enter the county name, not each of the 15 individual cities within that county.
But make sure you don’t extend your area too broad. You don’t want to show up for potential clients in areas where you are unable to serve.
Step 10: Your Business’ Contact Details
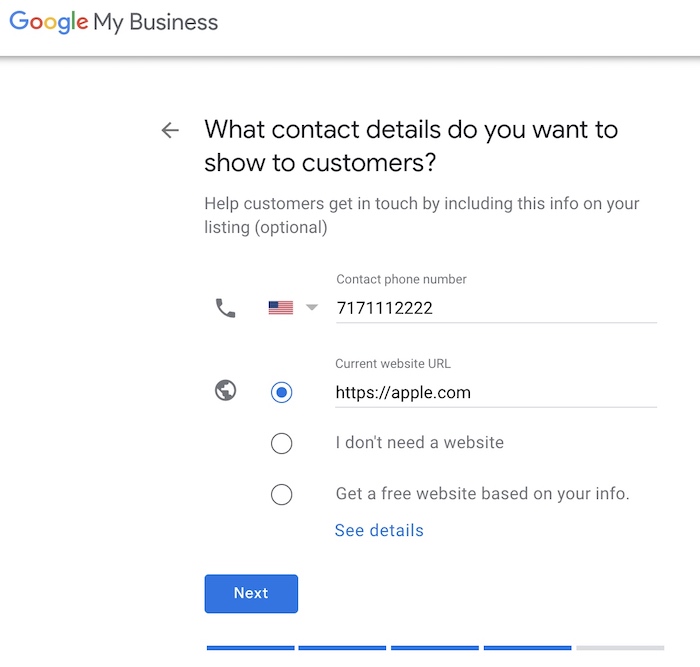
Put in your business phone number and not your personal phone number in this step. This is the phone number that will show up publicly on your Google My Business listing.
If you already have a website, type in the website’s address (URL). If you don’t have a website yet, click “I don’t need a website” for now, and you can go back and add your website later, after you build it (See “Phase 2” below for help with this).
Step 11: Click Finish (Almost Done!)
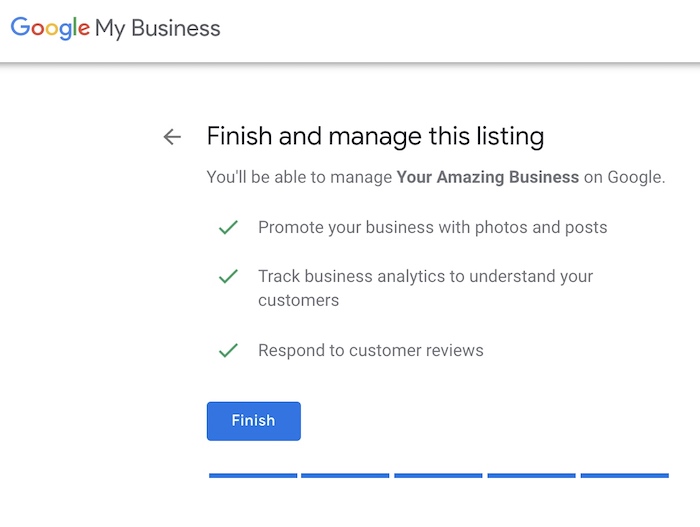
If you’re sure you typed out everything accurately in the previous steps, go ahead and click the blue “Finish” button on this screen. If you’re not sure, you can click the left arrow to return to the previous steps and check your work.
Step 12: Choose A Verification Option
Google needs to verify that you have the authority to create and manage this Google My Business listing for your business.
The exact options you’ll see in this step can vary from time to time, which is why we have not provided a screenshot. Typically, you’ll be given the option to type in your business’ address and request a verification postcard to be mailed to you. Sometimes an option is given to have Google’s system call or text your phone number and provide a code for verification.
Step 13: Finish The Verification Process
If you chose the postcard option in the previous step, it usually takes 2-5 business days to receive the postcard. The postcard will have instructions on how to finish the verification process.
If you chose the phone number option for verification, then follow the prompts on the phone, and the verification process is usually finished within minutes.
If you’ve completed all of the steps above, congratulations! You’ve done what it takes to make your business show up on Google Maps when people search for your business name.
There’s still plenty more you can do to optimize your Google My Business listing, such as adding photos or a 360 virtual tour of your store or office, getting your first couple reviews, and more. But before (or while) you do all of that, it’s time to move into Phase 2, which is all about creating a website for your business.
Phase 2: Create A Website For Your Business To Show Up on “Google Search”
Need to come back to this step later? Click here to save this step, then on your keyboard press Ctrl + D (Windows) or Cmd + D (Mac)
Once you’ve completed Phase 1 above (to create your Google My Business Listing), your business will appear on Google Maps and on Google Search when people search for your business name.
This is helpful if your business is well known in your area. But what if most of your potential customers or clients haven’t heard of you yet? If all you have is a Google My Business listing (Phase 1 above), it’s very unlikely that your business will show up when people search for services that your business provides (e.g. “roof repair” or “family law practice” or “lawn mower repair”).
So how can you make your business show up on Google Search (not just Google Maps) for those more generic search terms?
This is where a website can help tremendously.
But don’t worry, even a very simple website is a step in the right direction. You can create a simple website even if you haven’t created one before (even if you do not consider yourself tech-savvy).
We’ve divided this section into 2 overall steps.
Step 1: Setup Your Domain Name And Hosting
Before you can create a website for your business, you’ll need to first register a domain name and set up a hosting account.
Not sure how to do that? The easiest option is to have a team of experts (such as our team here at Sharp Innovations) do this for you.
If you want to try this yourself, there are plenty of one-stop-shop web hosting companies to choose from including Wix, SquareSpace, GoDaddy, and more.
Since the exact steps you’ll need to take depend on which web host you choose, we recommend contacting your web host’s support team if you run into technical problems.
Tip #1: Your domain name is your digital “address” for your website, so we recommend keeping it as short as possible. For example, if your business name is “Johnny Appleseed Lawn Care Maintenance”, consider something short like appleseedlawncare.com or johnnyappleseedlawncare.com.
Tip #2: We also recommend choosing the “.com” option if possible, instead of “.net” or “.business” but those are fine too.
Step 2: Create Your Website
If you chose a one-stop-shop web host in the previous step (SquareSpace, Wix, etc), you will likely be given a choice of templates to choose from for your website.
While we highly recommend that you eventually build a multi-page, SEO optimized website for your business, you can start with something simple at the beginning.
If you go the simple route, you can create a one-page website that has your business name, your logo, and a little information about your business. Several things we highly recommend including on your website include:
- Business logo
- Business Name, address, and phone number
- List of services you provide (with a description of each service if possible)
- Your credentials, to build trust and credibility (such as any relevant certifications you or your team hold, any awards your business has won, etc)
- Contact form so visitors can reach out to you.
Feeling overwhelmed? We can help! Our team at Sharp Innovations has been building, designing, and hosting websites for more than 20 years. Request a free consultation to see how we can serve your business!
Phase 3: Publicize Your Business’ Name, Address, and Phone Number
If you’ve finished Phases 1 and 2 above, you’ve made great progress!
But there’s one more step that many business owners forget or don’t know about. If you miss this step, your business might not always show up when people search for it on Google.
That step is to submit your business’ contact information to relevant business listing websites. Although this may help you to get your business exposure on other websites, the main reason to do this is to show Google that your business’ name, address, and phone number are listed in the same way on multiple websites.
There is a way to do this for free, although it is more time-consuming and less effective. The free way is to manually submit your business information to multiple websites and business directories. Some common sites include Yelp, Better Business Bureau, Foursquare, and more. You can find other sites by searching Google for “service type” + directories. For example “roofing contractor directories” or “family law firm directories”
The easier and more effective way to do this is to have a team of experts handle this process for you. Our team at Sharp Innovations has provided this service to countless local businesses, and we’d be honored to help you as well. Get in contact with our team to see how we can help!
If you have done all of the steps above and your business still isn’t showing up on Google search or Google Maps, follow our advice on our other blog post where we answer the question “Why Doesn’t My Business Show Up On Google Maps?”
What’s Next? Here’s How To Get Even More People To Find Your Business
Getting your business to show up on Google when people search for your business name is an important first step. Without that, your exposure is limited to only word of mouth and offline advertising.
However, if your business only shows up when people search for your business name and it does not show up when people search for services your business offers, then you are missing out on a lot of potential customers or clients.
But to learn how to do this is beyond the scope of this guide, and it’s so complicated and time-consuming that instead of trying to do it themselves, most business owners hire this work out to a professional SEO (Search Engine Optimization) company.
We hope this guide has helped you to make your business show up on Google. If you have specific questions, please use the comments feature below or reach out to our team directly.